Today’s post is really as the title says: Turning your wedding bouquet into a lovely crafty DIY Frame.
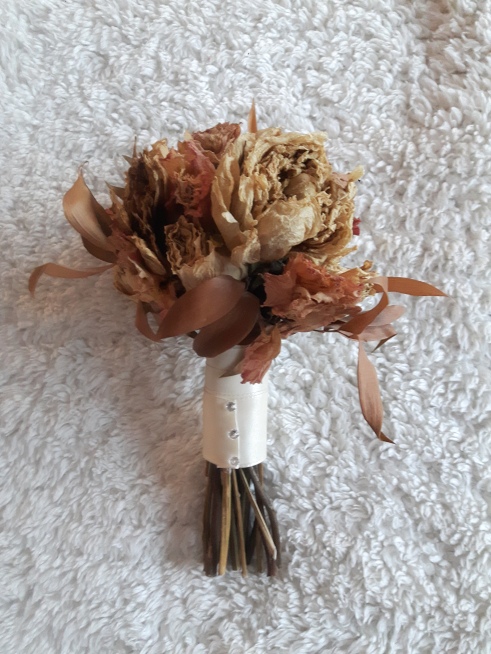
I brought my wedding bouquet home with me from Portugal – it got crushed in the suitcase and battered all around, however I didn’t have the heart to leave it behind. For almost a year I had the dried flowers in a vase over my bed gathering dust. Every time I’d be cleaning the room more and more leaves fell off and it became a real eyesore.
I started thinking what could I do to keep them, but to preserve them at the same time? And then the Ikea RIBBA Frame sprung into my mind! We had our wedding gifts for our parents made in those frames by Catherine from Dainty Dress Diaries and they are perfect for DIY/Crafts Projects as they are deeper than usual flat frames.
The size of the frame 23 x 23 and they are available from Ikea @ €4.90.
So, what you will need for this project?
- Wedding Bouquet
- Scissors
- RIBBA Frame from Ikea (or a Deep Frame suitable for crafts)
- Craft Glue (Superglue will not work on leaves)
- Hairspray (optional)
[Disclaimer: The frame is only few inches deep, before you start your project measure how thick your flower heads are as they might not fit properly into the frame which will not do the project any justice]

What to do?
- Using your scissors cut off the flower heads and provisionally lay them out to figure out where they should go within your arrangement.
- What I’ve done is I have glued the insert of the frame onto the back of the frame so I knew exactly the size of an area I needed to cover with my leaves/flowers.
- I then started to slowly glue my flowers onto the insert. I had a mixture of flower heads and leaves. TIP: Glue your biggest ones first and then fill in the empty spaces with smaller ones and individual leaves.
- As the back of the frame is brown some people like to paint it to a neutral color matching their flowers in case they don’t have enough flowers to cover the background area.
- Once you’ve finished your arrangement, spray the flowers with some hairspray (not too much) for a longer lasting result.
- Close the frame and figure out where to display your handiwork 🙂


If you decide to do this project on your own, I’d love to see the results! Feel free to tag me on Facebook or Instagram.

Below, you will see the bouquets on my wedding day in all their glory! 🙂

Joanna x


Leave a comment